To uninstall ProjectTransit 3.x:
1. On the Windows Start menu, click Settings, then Control Panel, and Add or Remove Programs.
2. Make sure the Change or Remove Programs option is selected.
3. From the list of programs, select ProjectTransit.
4. Click the Remove button to begin uninstalling ProjectTransit.
5. Follow the instructions on the ProjectTransit Uninstall Wizard.
To install ProjectTransit 4.x:
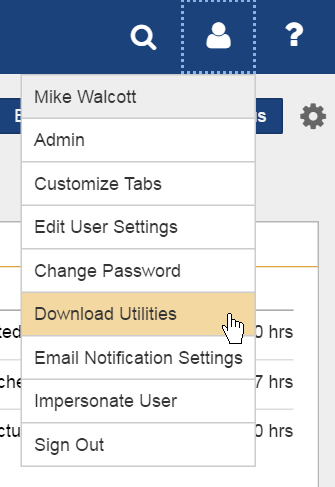
Navigate to the link for downloading ProjectTransit which appears in the Download Utilities section of PPM, accessible from the User Settings menu. You can access this command by clicking the arrow next to your user name at the top of the PPM screen.
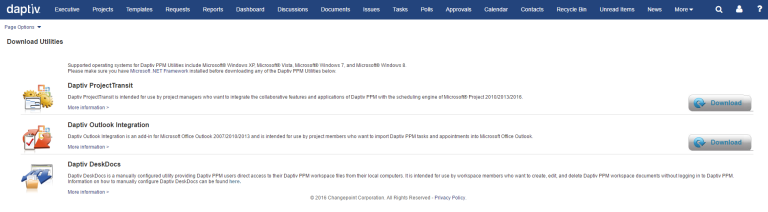
Select Download from the Daptiv ProjectTransit row.
Once ProjectTransit is downloaded:
1. Browse to the folder on your computer where you saved the ProjectTransit installer file.
2. Double-click on the installer file.
3. Follow the on-screen instructions to install ProjectTransit on your computer.
If the installation of ProjectTransit does not successfully complete, or if it completes but ProjectTransit does not appear to be functioning properly, manually uninstall all instances of ProjectTransit using Add/Remove Programs and then reinstall the latest ProjectTransit version.