If you are upgrading from ProjectTransit, please see the following link for details:
How do I upgrade ProjectTransit?
If you are installing ProjectTransit for the first time, please follow the instructions below:
ProjectTransit requires a special Changepoint PPM license key. This license key allows you to use ProjectTransit to synchronize your Microsoft Project schedules with Changepoint PPM schedules. Update the license key in your Changepoint PPM administration area.
Before installing ProjectTransit, verify that your computer meets the system requirements.
If your computer meets the system requirements, take the following steps to install ProjectTransit.
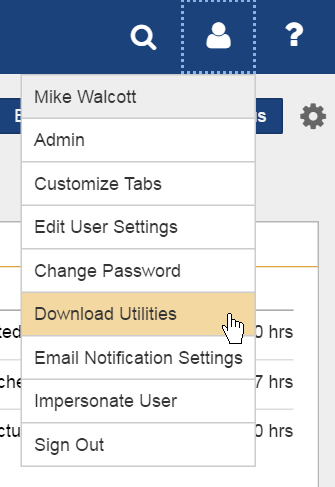
If your PPM enterprise is licensed for ProjectTransit, a link for downloading ProjectTransit appears in the Download Utilities section of PPM, accessible from the User Settings menu. You can access this command by clicking the arrow next to your user name at the top of the PPM screen.
Next, select Download from the Daptiv ProjectTransit row. 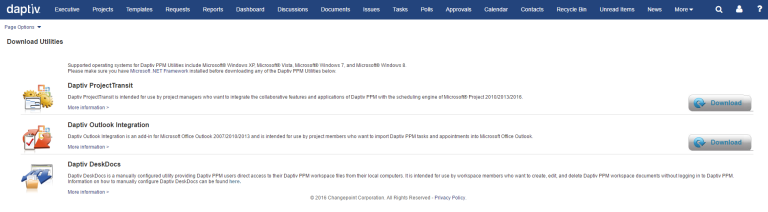
Once ProjectTransit is downloaded:
If the installation of ProjectTransit does not successfully complete, or if it completes but ProjectTransit does not appear to be functioning properly, manually uninstall all instances of ProjectTransit using Add/Remove Programs and then reinstall the latest ProjectTransit version.
To uninstall ProjectTransit: